|
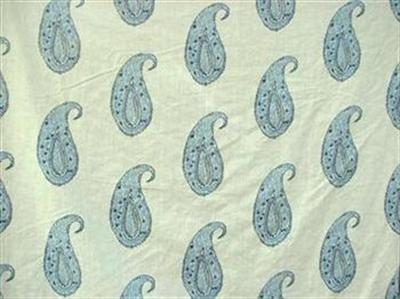
While you’re waiting for your regularly scheduled Annie Sloan Chalk Paint “after” shots... a work in progress I assure you {and hey, did you see that Annie herself left a comment?}... I thought I’d share some creepy stalker behavior, I mean imporant blog research. You obviously know who Lauren Liess is, right? She’s the unbelievably talented designer {and blogger} who recently launched her own line of textiles. Her work has been featured everywhere, but most notably in several Better Homes and Gardens magazine spreads and the always stunning DC Design House. And guess what? She’s a Northern Virginia local, and her house is currently on the market. Insert an open house and you have instant stalker because yes…I went. Although in my defense, I did bring my sister-in-law who may or may not also be {a stalker}, I mean interested in moving into a larger home. That's my story and I'm sticking to it! ;-) So you’ve probably all seen the amazing images from Lauren’s home, and NO, I didn't take any during the open house. {I thought about it, but left my camera in the car. I think it was a smart move because the real estate agents didn't look like they wanted to tolerate any shenanigans. Can't say I blame them!} These are only a few of my favorites, but visit her blog for many, many more. Here's the stunning entrance with a collection of framed Da Vinci sketches. 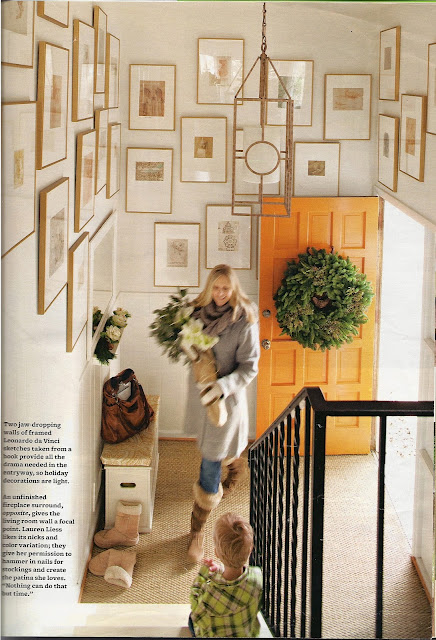 This might be one of my favorite room photos of all time: The beautiful green velvet sofa, the floral chairs, the mirror, the rug...all to die for. 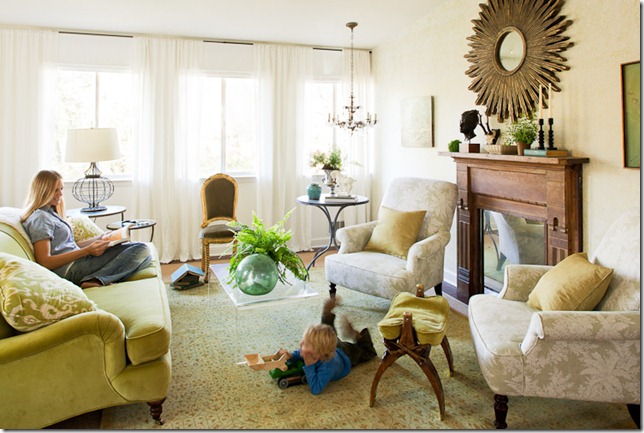 Here's another shot of the same room. I love the watercolors and the way everything is so perfectly balanced. Isn't it so inventive to use a chandelier on one side and a floor lamp on the other? 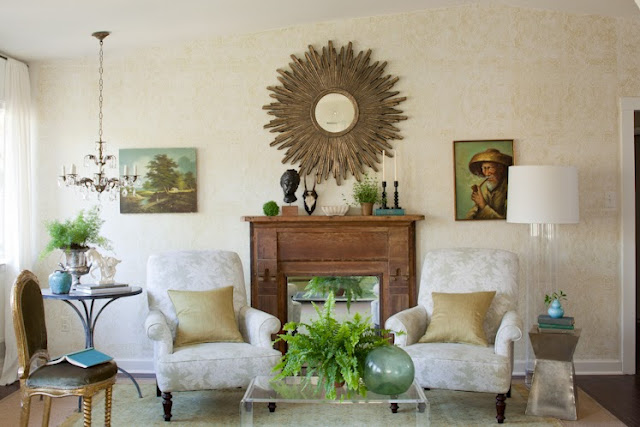 Look at this chandelier! It’s one of the many things that was tagged as “does not convey,” which is not surprising given the high-end nature of many of the accessories and textiles. But the realtor did say that Lauren would work with the home buyers on a design plan. What? How awesome is that! 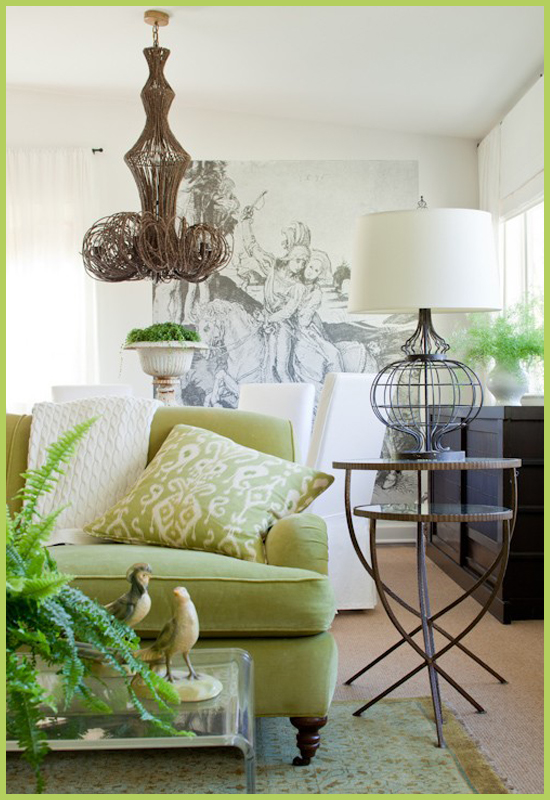 Hey, I have that same table in my kitchen! It doesn't look quite as good though... 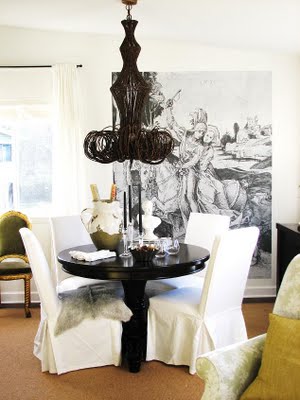 Here's the kitchen. I think the island is different now? 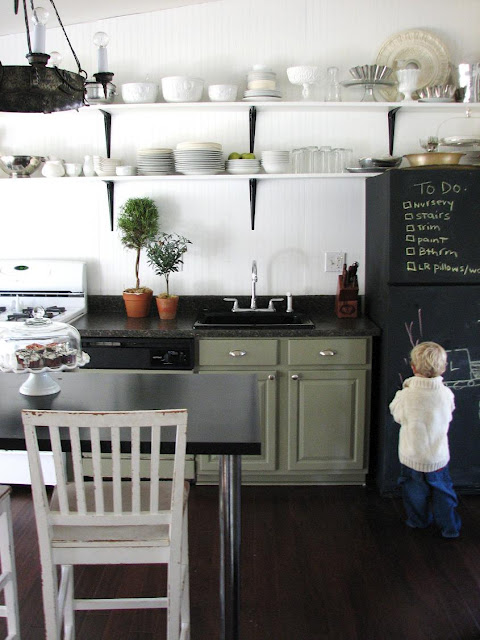 I love the chandelier in the master bedroom, and the bowl of magazines: 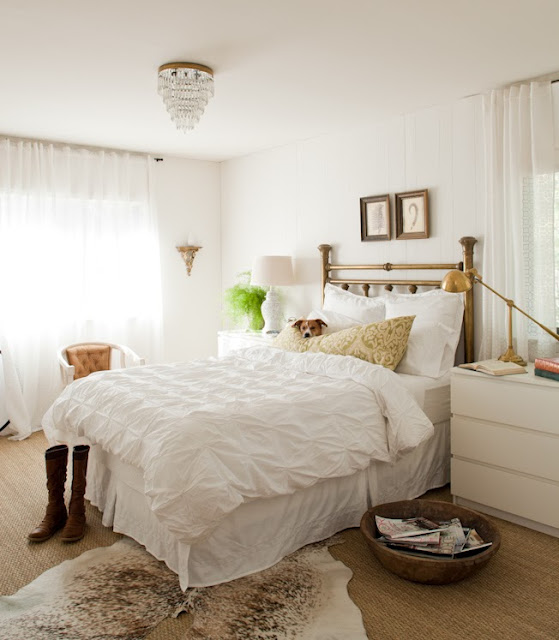 This is part of Lauren's office, which looks out onto the backyard: 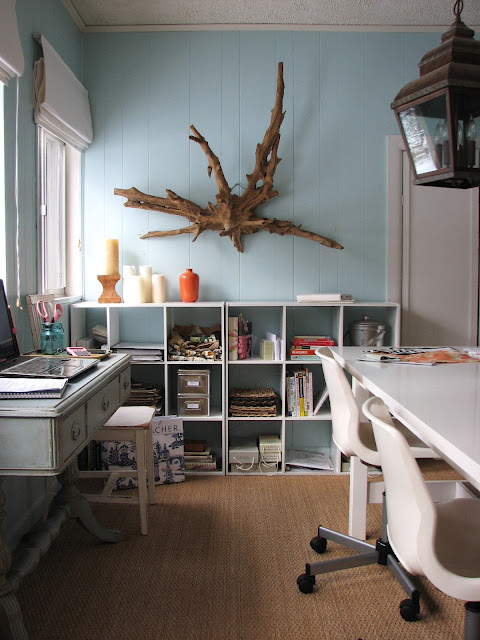 She took a little shed and made it into a playhouse for her boys. See what I mean?! Genius. 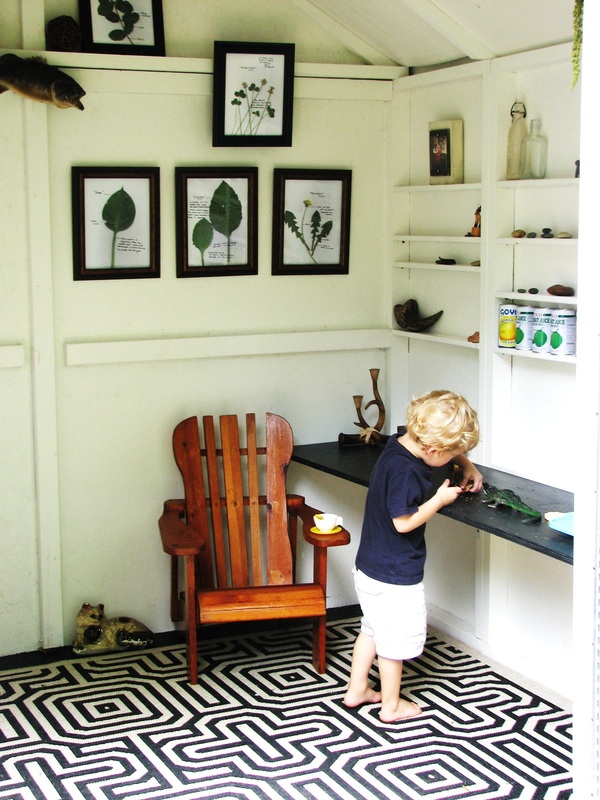 Here are some pictures from Lauren's room in last year's DC Design House, although it looks like it could be a room in her home! Those chairs are part of her upcoming furniture line:  And how amazing are these layered cushions? 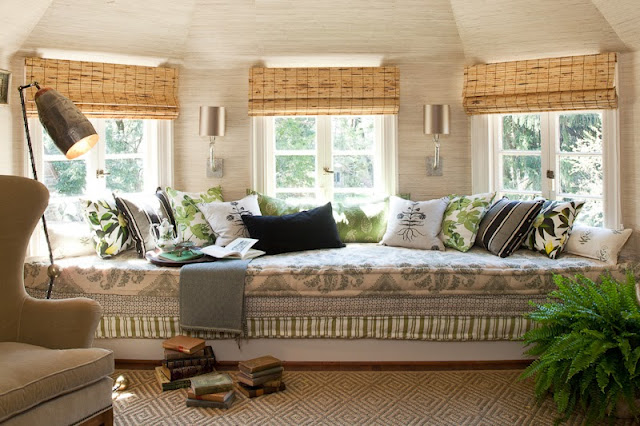 Here are two of my favorite fabrics from Lauren's line: Filigree Chevron {l} and Live Paisley in Indigo {r}. You can see the full collection here.
When I left Lauren's house, I was honestly inspired...I actually drove to Lucketts Store {it was near a place that sells chalk paint because yes, I needed more!} What she has done is nothing short of amazing, especially when you consider the house she moved into. Sure, there are some stunning statement pieces which really stand out. But overall, it's really the mark of creativity, vision, and the infusion of true soul into a space, collected over time. Seeing it in person was something special. {I believe that most, if not all of the above photos are by Helen Norman.} Have a great Tuesday! :-) 
8 Comments
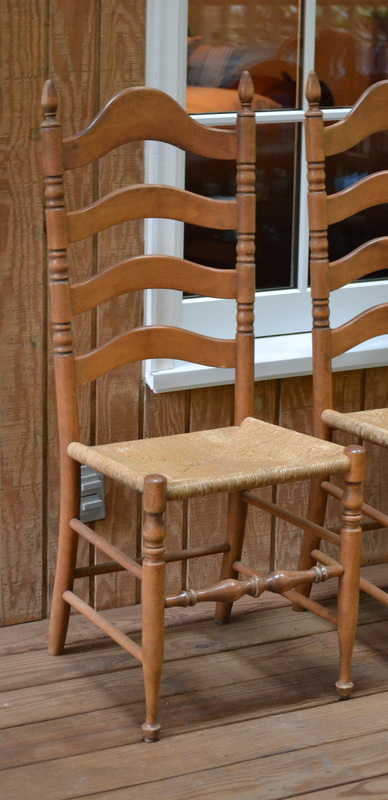
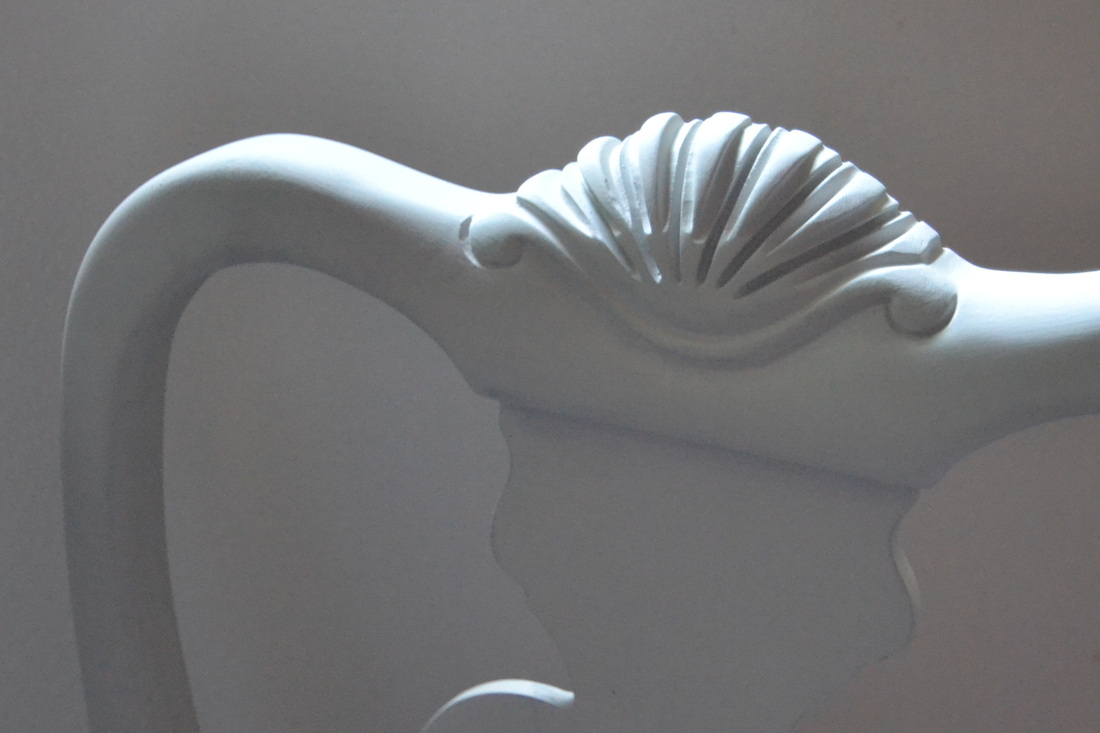
Oh friends, I’ve been a painting machine for the last few days! It rained almost the entire weekend {I can’t even remember the last time that happened} so I had lots of time to spend in the garage on my epic quest to conquer my secondhand dining table and eight mismatched chairs with the mythical Annie Sloan Chalk Paint {that was a mouthful!} I bet you couldn’t even sleep this weekend, wondering how this whole thing was going to turn out. I know. Here’s what I learned: Chairs are harder to paint than tables. The first four were old ladderbacks with rush seats. When Brian saw me painting them, he told me it wasn’t even worth it because they’re so old and kind of falling apart…and I can see his point. But, they were the chairs in my parents’ kitchen when we were growing up, so I wanted to see how they would respond to a little “fluffing,” since they have sentimental value and everything.
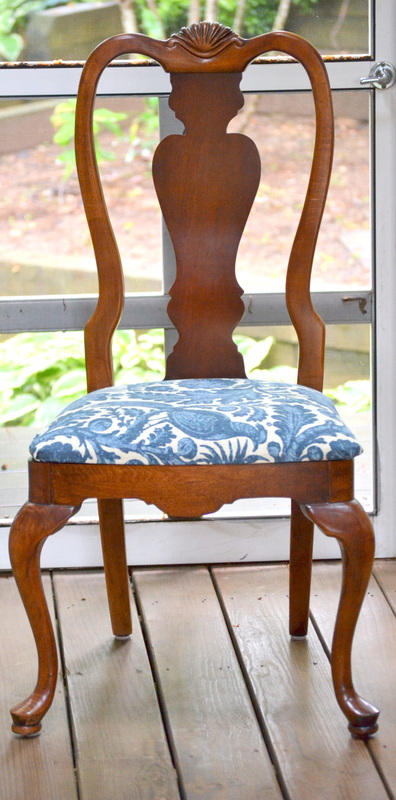
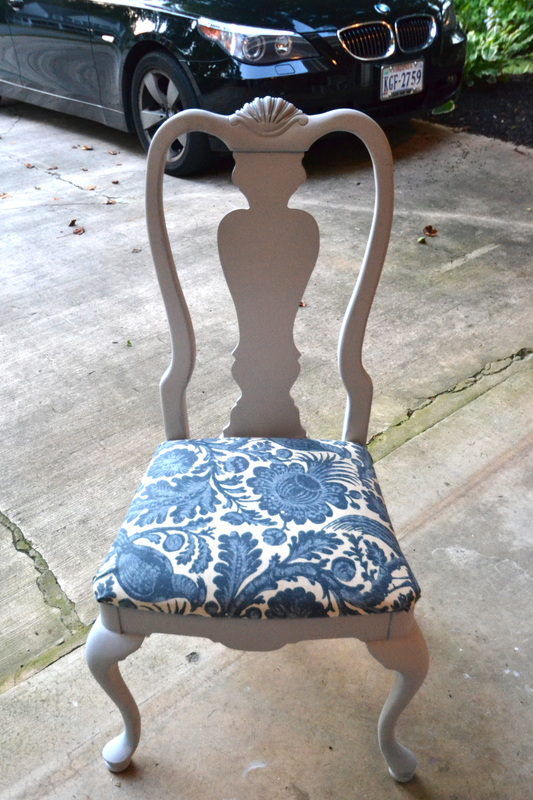
I thought I did a pretty good job, but the combination of constantly missing spots and some bleed-through of the brown wood required me to go over them. And over them. And over them. And… {you get it, right?} I was hoping to avoid two overall coats, but I couldn’t. Luckily, the quart of chalk paint seems to be bottomless. I finally took some pictures that captured the first coat. Very chalky in appearance and to the touch: 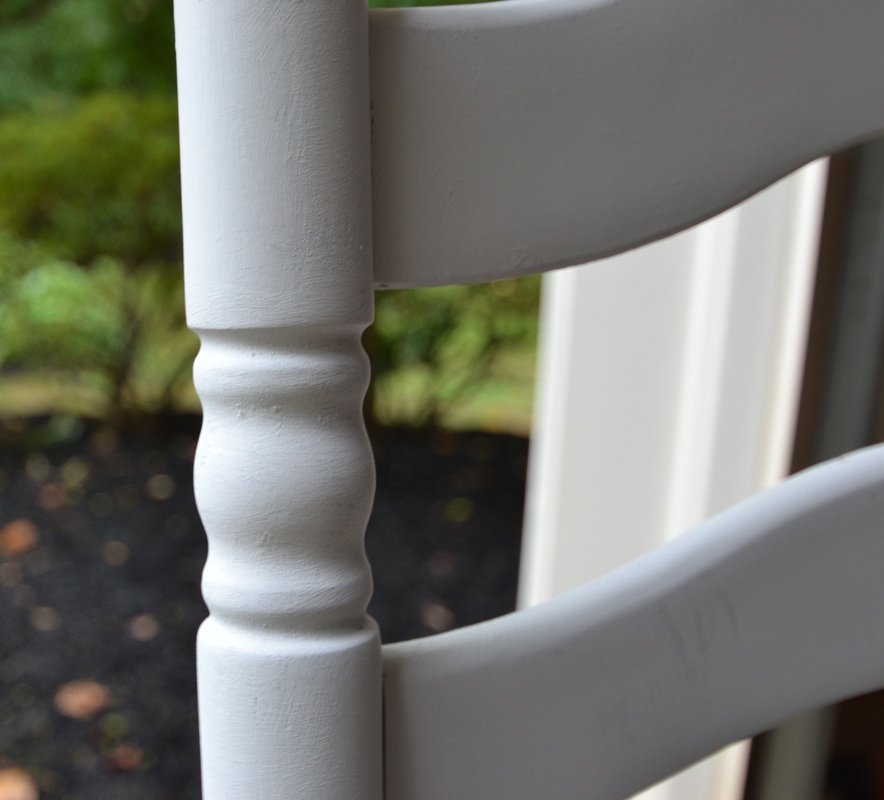 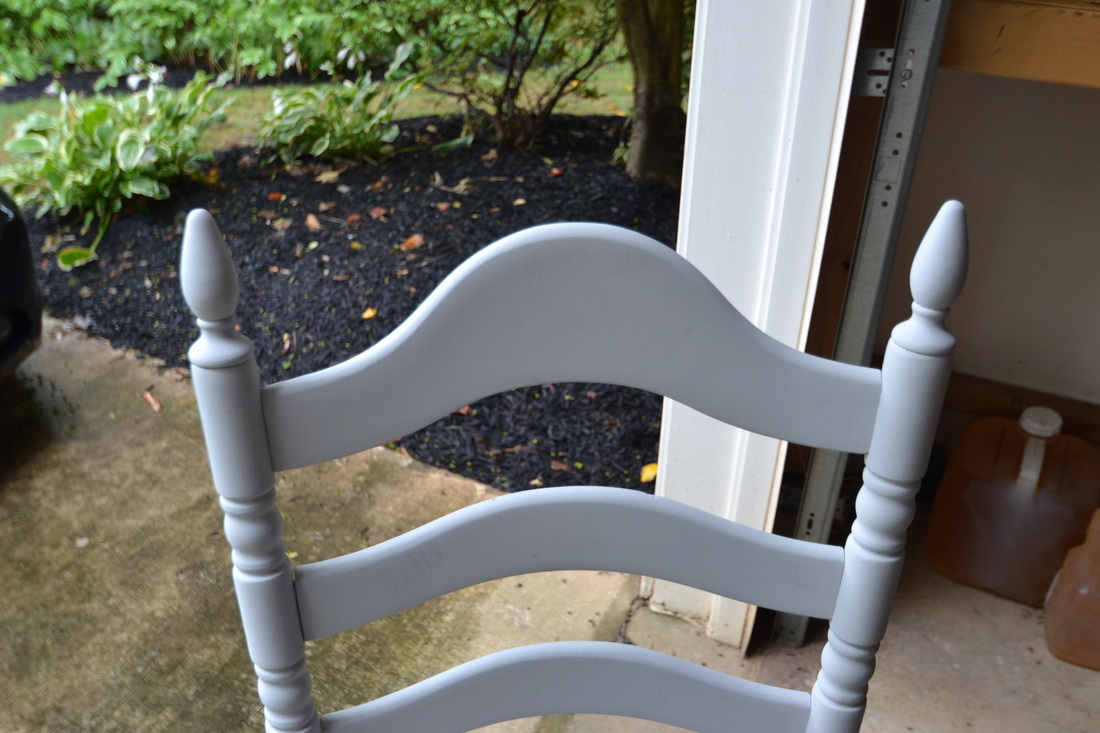 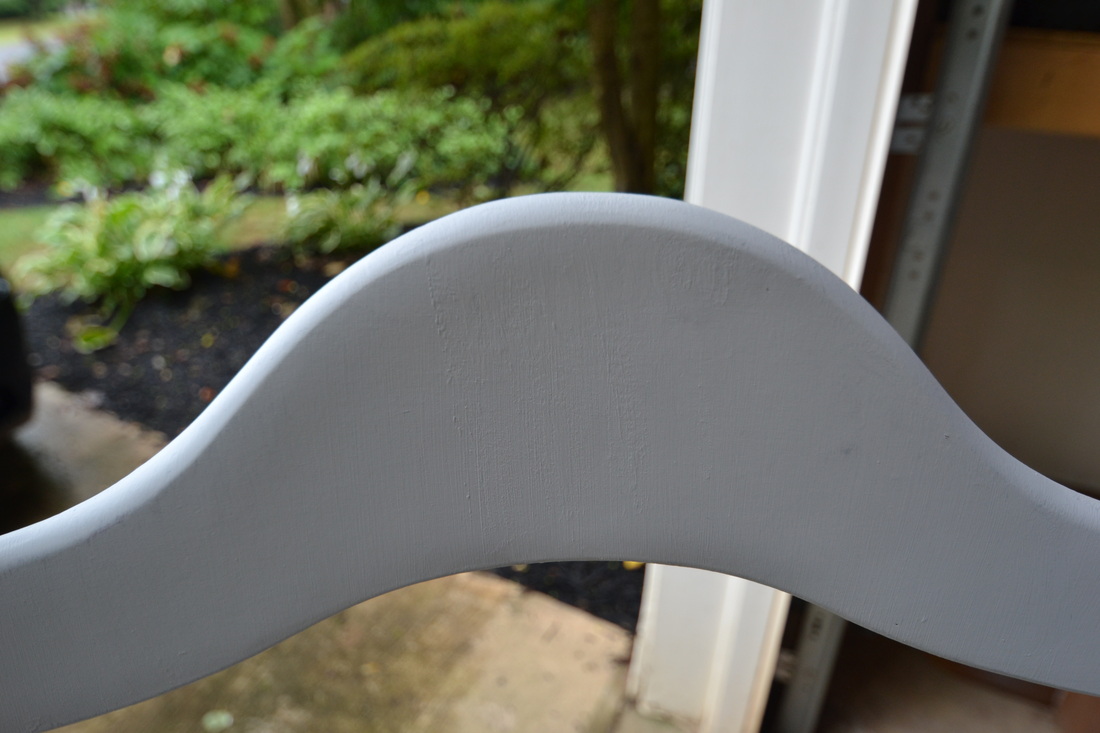 The second set of four chairs actually matches the table. They were in great condition, but since I’m putting them on my screened-in porch, they were way too formal. I’ve only finished one coat on these, but let me give a HUGE shout out to the best paintbrush ever, the Purdy Nylox. I was able to get into the tiny grooves, and the brush retained its shape and lost no bristles at all! I’ve only applied one coat {and I’ll definitely have to do two}, but so far I love how they’re turning out. 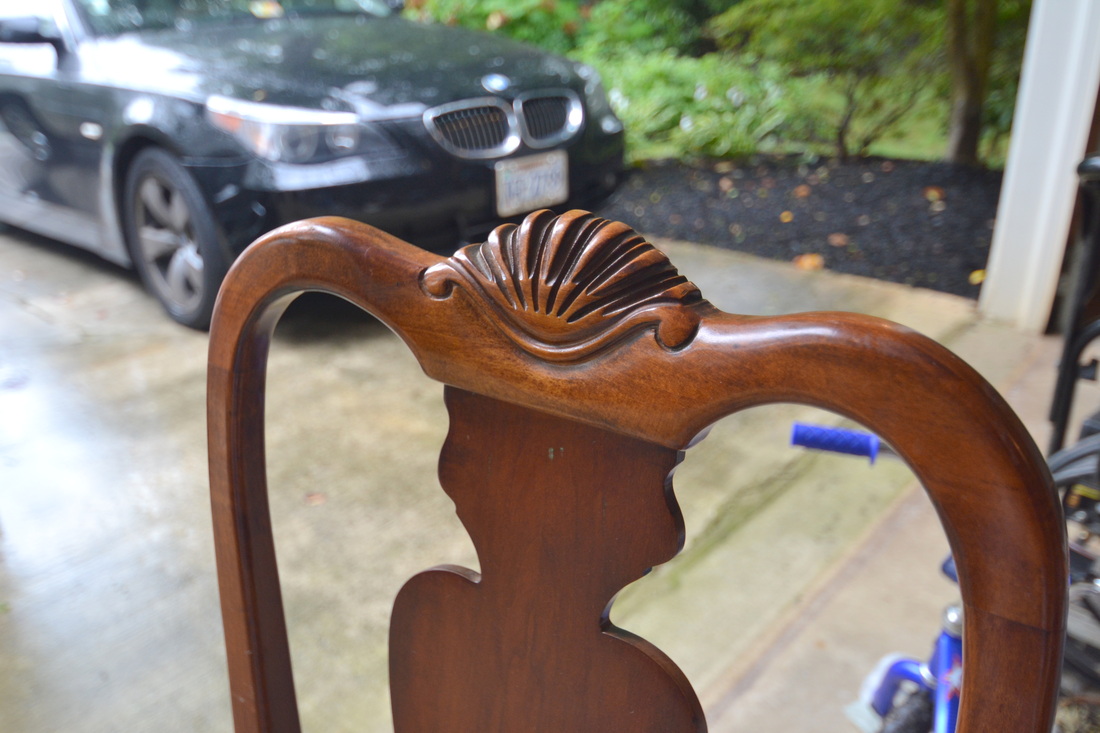
 I can tell the clock is ticking on my garage-squatting, so I’d better get moving and finish these chairs! I also need to apply another coat of wax {maybe two} to the table, because I set the paint can on it and it left a mark on the finish. I’m still not sure how the paint will hold up to the abuse of our family, not to mention the elements since it will be on the porch. However, I noticed that ASCP can be used on floors {really, Annie? You're such a showoff} so it should definitely hold up against some measly Beyblades. And if you know what Beyblades are, you probably have little boys. :-) 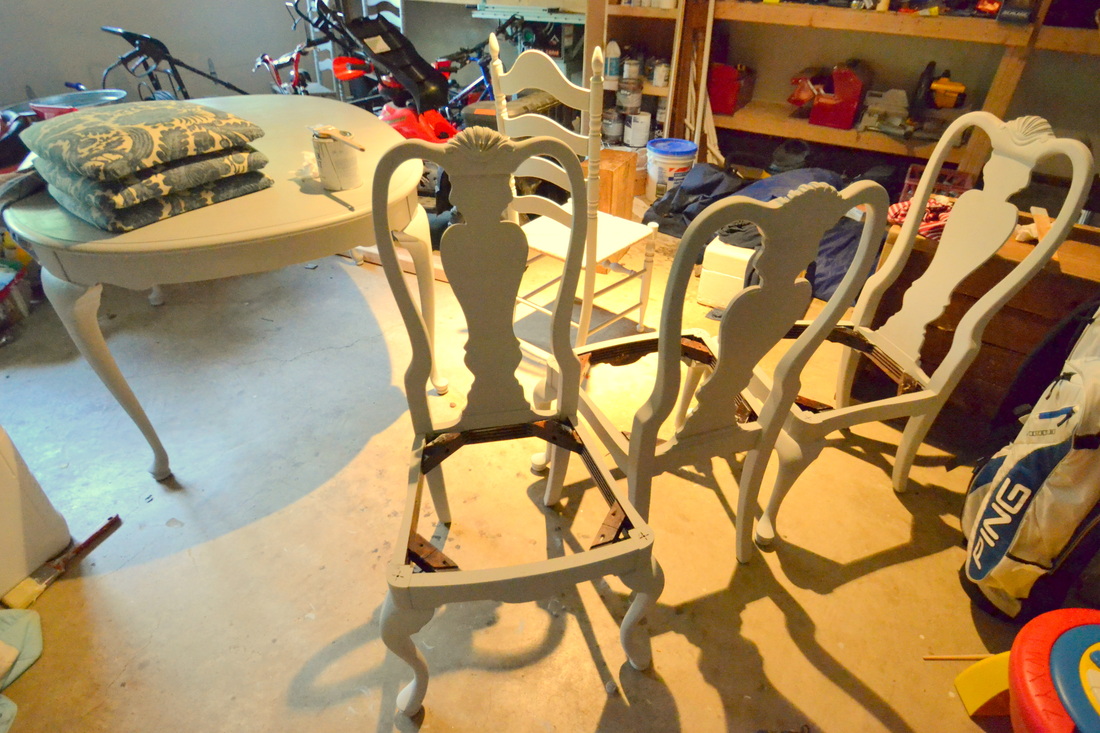 Thanks for sticking with me on this epic journey. It's 6:00 a.m. so I'm going to try to get some chair-waxing in before the kids wake up! {Yes...this is what my life has become.}  Joined Debbie Doo's Newbie Link Party ,Chic On a Shoestring's Flaunt it Friday, Addicted to Decorating, and  In my last post, I showed you the first part of my "how-good-is-Annie-Sloan-chalk-paint REALLY?" experiment. I started wondering near the end of the first coat why I hadn't started with something small like say, a picture frame, because this table is a beast and it seemed to be taking forever. I always start out with a painting project and think, "this is fun!" It was so quiet and calm, and I had my 5-year-old painting this cardboard box next to me: 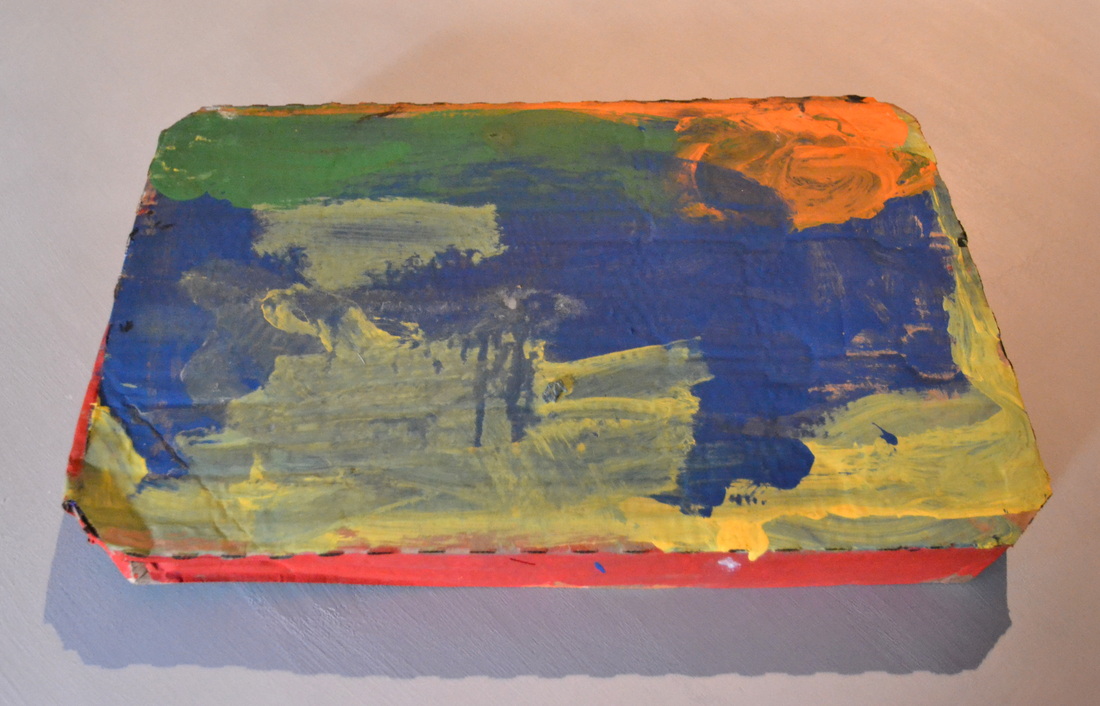 About 15 minutes in, I start to think, "wow, this table is BIG. This is going to take me a while." And wax too? Man. Remember how I was going to paint every wood surface in my house? Yeeeeaaahh, that may not happen. But really, it didn't take long at all. I put a second coat of paint on the top, and touched up the legs and some other areas. I'm learning: this is really meant to provide an aged look, so it won't be perfect...but when the second coat dried {and I still saw brush marks, which made me a little twitchy but I'll get over it} I realized how nice, matte, and mellow the finish turned out overall. I also realized that you really do need the wax to protect the finish, and even then, you have to be OK with imperfection. I mean, PATINA. ;-) Here it is after the second coat dried. Are you thinking what I'm thinking? Yeah, I could have saved myself the trouble of a second coat because it really looks no different at all: 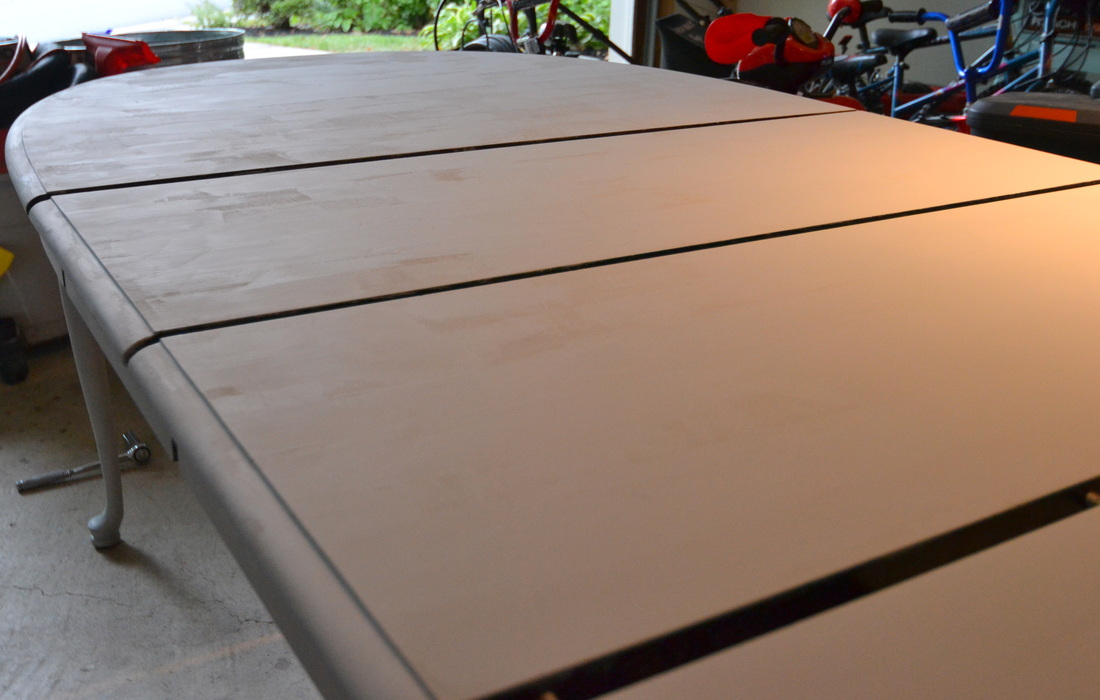 But moving on to the wax. It's called "Soft Wax" and it's clear. It's meant to protect, and also refine, the finish. Protection is needed because I put a glass of water on the painted finish and it definitely left a mark. Apparently you can also get a dark wax, which {I assume} would provide a more pronounced aging effect and clearly define the edges of the piece. You can also mix the paint with the wax to make a tinted/colored wax, but let's get through this first, shall we? ;-) As advertised, the wax was VERY soft. There are "wax brushes" you can buy, but I didn't feel like doing that, so I used paper towels to rub it into the finish, which worked fine until I noticed that tiny bits of paper towel were getting stuck in the wax. Gahhh. So I switched to an old white pillowcase and I was good to go. Immediately, I noticed that the wax darkened the paint by a few shades, which I loved, since "Paris Gray" initially didn't seem very gray at all. But as promised on the can, it lightened up when it dried. Oh well. It still looks pretty. The wax also buffed out some of the more egregious "patina" and gave the table a very subtle sheen. In my vast research {I read one post and I can't even remember where}, I learned that applying the wax should be like applying conditioner to your hair, i.e. no residue, greasiness, or tacky texture. Once I applied two coats, I wiped the whole table down. Unfortunately, I couldn't accurately capture the finish in a photo, but I do have this little gem for you: 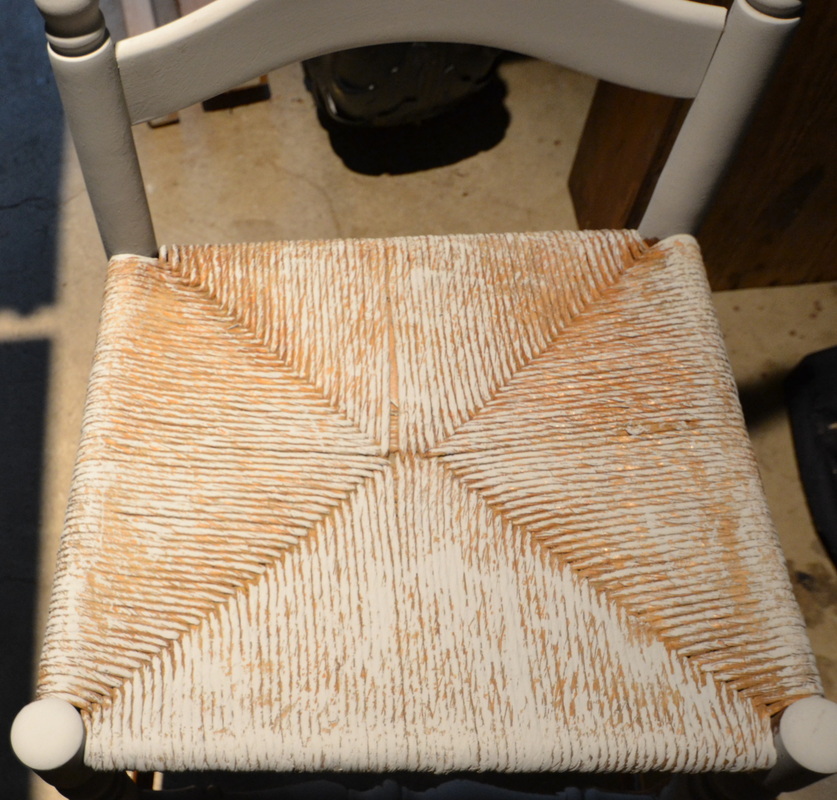 Annie Sloan, if you're reading this {and I know you are}, I found it! The one thing that your paint is NOT good for: rattan chair seats! You didn't think I could stick to just the table, did you? ;-) I'll be back with the finished table {this time I mean it!} and hopefully 8 chairs too. And maybe a bench, a mirror, a mantel...my car, the neighbor's dog... :-)  I know, I know...I may be the last person ON EARTH who has not tried Annie Sloan Chalk Paint, and you probably said you'd curl up in a ball and start rocking if you read another blog post on this topic. I just haven't been compelled to go out and spend $38 on a quart of paint, not to mention the $36 tin of wax. {If my husband is reading this, I'm totally exaggerating the price. Because really, who would pay that much for paint?! NOT ME.} For those of you living with me under this rock, the special thing about ASCP is that you don't need to sand, prime, or do anything else before diving right in. You can paint wood, brick, marble, anything you can dream of! Doesn't that sound awesome, and worth a fortune? {We'll see.} For some reason {impulsive, anyone?} I recently decided that I had to have some. NOW. And not only that, but I needed to paint approximately 1,435 things, immediately. Does anyone else do this? It's a sickness. I get carried away easily. So I went to this lovely local shop, Stifel and Capra, because Kelly from Stylish Patina is a chalk paint "stockist." Which must be a very exclusive thing, since there are only two of them in the entire Northern Virginia area. I thought Kelly's displays were very well done, and she seemed to have a nice selection of paints, tools, and waxes. She also had some really cute note cards and other stuff. I wish I would have brought my camera! Next time. I also had a nice chat with the shop owner about the quality of our public schools and the outrageous real estate prices in the area. When I have more time to browse, I'm looking forward to going back. I bought "Paris Gray" paint and a clear soft wax. 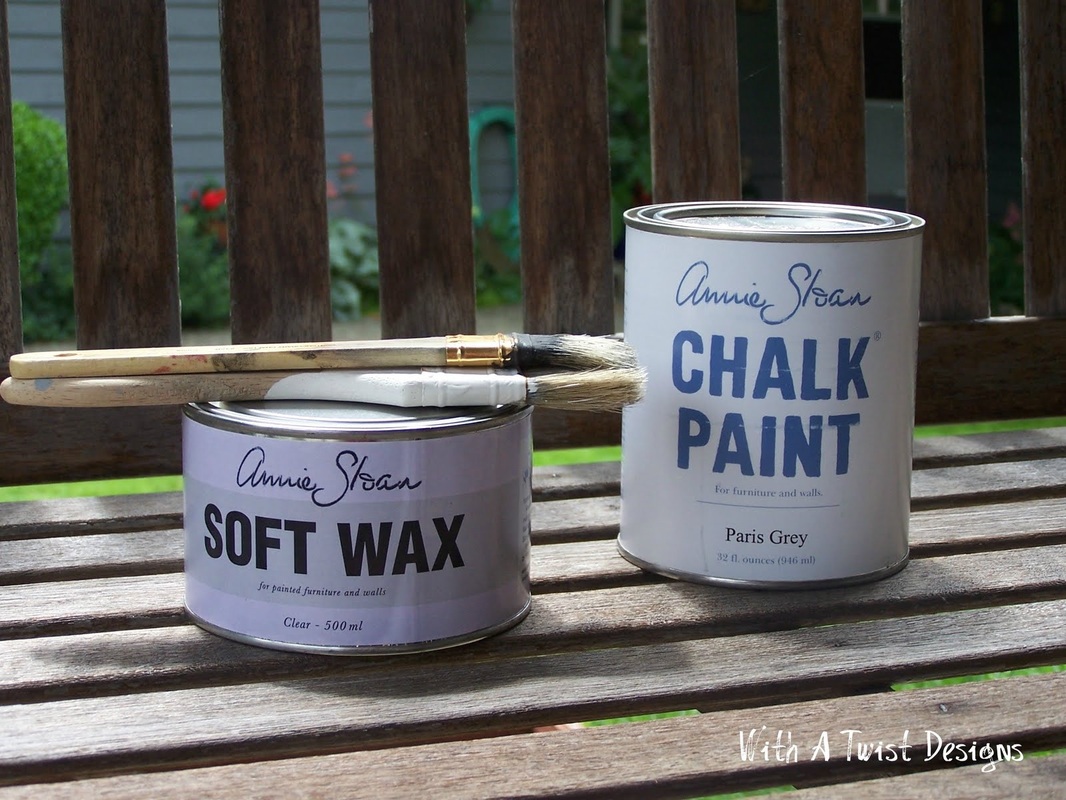 Even though I had major plans to paint every wood surface in my house, plus possibly my husband and kids if ASCP was really THAT GREAT, I knew I had to start somewhere. So I dug out this table, which was a "the-moving-trucks-will-be-here-any-minute-and-I-need-to-get-rid-of-this-thing"gift from my former next-door neighbor. It's a nice table, and I'd like to use it on my screened-in porch since it has 2 leaves, but there was some damage on the top:   A perfect first victim! I mean candidate! ;-) Muahaha. I also bought a new paintbrush to go with my fancy paint, and it is AWESOME: so easy to clean, the bristles don't fall out, and the paint goes on so smoothly. It's a Purdy Nylox 2":  Here are my initial impressions, after finishing the entire first coat: 1) A little goes a long way. I painted the whole table {including 2 leaves} and I hardly used any paint. 2) It's really thick, and dries quickly. So if you paint and try to paint over it, it gets a little sticky and difficult. After one coat, you can see the brush marks and black/silvery marks when it dries. If you like a distressed look, you would like this. If, like me, you want a smoother finish, you'll probably need multiple coats. See the brush marks? 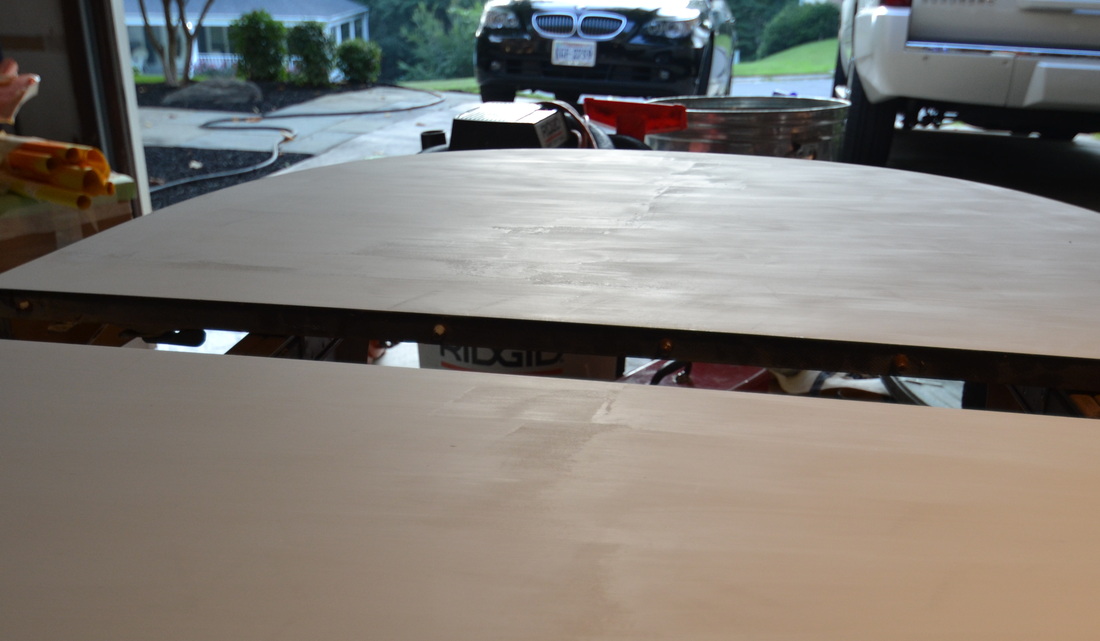 Here she is with her first coat {except the feet, because I didn't feel like covering the garage floor. Although, look at all those stains! Would it have made a difference?} I'm going to try to apply a second coat to the top, before the kids wake up and we have to get ready for camp/preschool/work. Wish me luck, and I'll be back with a near-finished product...I hope! 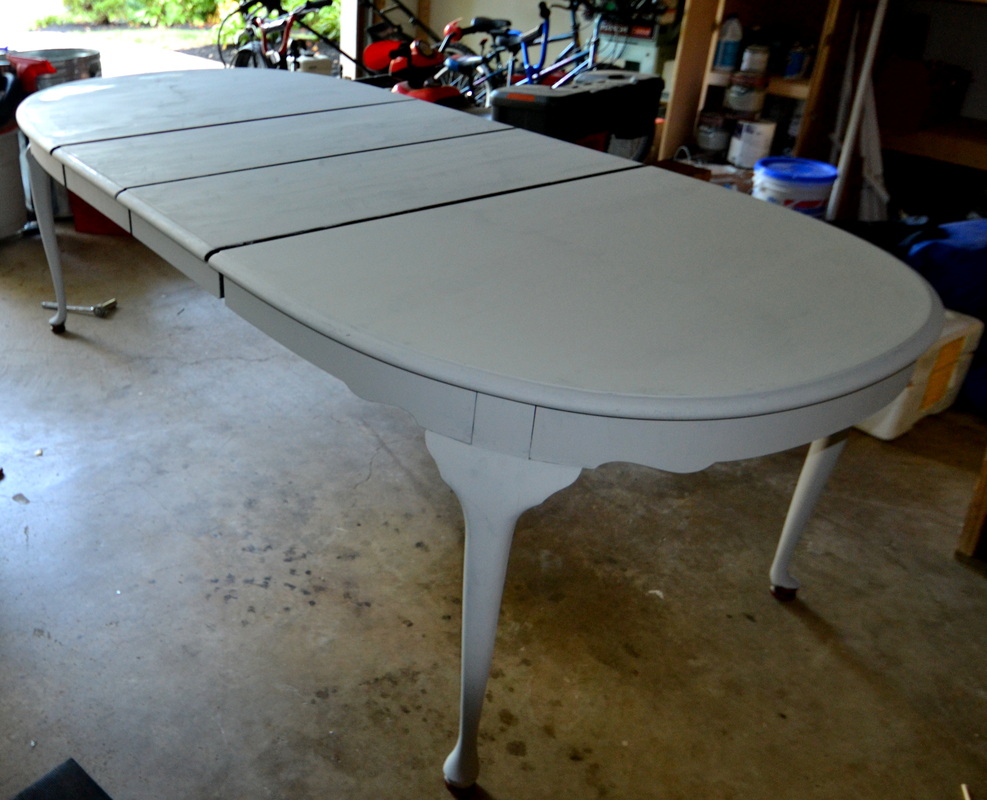   So I’ve had 2 requests for my “bio” in the last month. The first one was for work, since I was presenting at a conference: It took me about 2 seconds and I didn’t think twice: 11 years with blah, BA from blah-blah, MPA from blah-blah-blah. *BIG YAWN.* The second request came from Claudine at DC Metro Mom website. I’m going to start blogging over there {yay!} and here’s what she said: “Your work looks great. You can start to blog immediately. I would start with an "Introduction Blog" where you highlight your existing site, the type of blog you write and I would also weave in a bit of a bio. It could essentially be an "About Me" blog.” Say what now? About who? You may have noticed that my "About Me" section is pitifully small. And that got me thinking about something I didn't really get when I started this blog 7 months ago: Blogs are about people. Sounds simple, right? But I really didn’t grasp the concept until I thought, what would Design Indulgence be without the hilarious Sherry Hart (if you need a laugh, read this)? Or The Lettered Cottage without Layla and Kevin {blasphemy…I know!!!} Or Thistlewood Farm without the always kind and funny Karianne? I’ll tell you what they would be…pretty pictures. Which I like, but I can go to Pinterest for that. I've actually stopped following blogs in the past because everything seemed just a little too perfect...and I couldn't find the personality behind the pictures. People read blogs because they like the people. Hmmmmmmmm. At work, I find it easy to deflect attention from myself: "It's not about ME, it's about the WORK, it's about the TEAM!" But here, there is no work. There is no team. There is just...me. YIKES. I'm that person who actually dreaded my wedding and baby showers because I hated being the center of attention. I'm also a little weird about privacy, so I've avoided saying too much about my family {especially my kids}. But when I look back on this blog in a few years, what will I say? "Oh, I remember that tablecloth! Ha! Memories." Probably not. Slowly, I'll come around and make this blog a little more about me, as difficult as it may seem now. I've actually heard from a few people who know me personally, and they've told me that reading this blog is like talking to me, which is good {unless you don't like talking to me, in which case...it's bad}. I'm planning to dig up some pictures, if I can find any where I'm not behind the camera lens, that is! ;-) Stay tuned, and thanks for reading if you made it this far. Nervous about hitting "Publish." But as my very first post title said: "Let's Do This!" Which means all of it. Even if I sometimes feel like this {courtesy of Layla Palmer via Pinterest}:  Source: skreened.com via Layla on Pinterest Thanks to all the awesome bloggers who have inspired me to do more, and more importantly, share more...whether I like it or not. ;-) In the meantime, I'll be looking for more "Before & After" projects to feature, with a little "About Me" thrown in for fun. Let's do this!!!
:-) The blogosphere is really buzzing about a new site...at least I think it's new? Hometalk. Some bloggers are serving as "ambassadors," and a few of them reached out to little old me, asking me to start posting some projects. I did, because I love certain blogs/bloggers and I want their ventures to be successful! But I kinda wasn't feeling it. It seemed like a lot of extra work. AT FIRST. Now I'm totally hooked. It's already replaced Pinterest as my go-to site for ideas and inspiration, because it's more substantive, interactive, and useful. Need advice? This is the place. Need inspiration? Same. I will say that there are a lot of projects which aren't really my thing, probably because they're cutesy and I'm a no-frills type of girl. Which means, if you post about a coffee-can-turned-light-fixture or rubber-boots-turned-planter, I'll probably skip it. But there's a lot of drop-dead gorgeous eye candy too, and it's a great way to discover other blogs. Regarding advice: You can post questions, and they will be answered by home and design professionals, other bloggers, and regular folks. Houzz.com has a similar feature, but it doesn't seem to be as active as Hometalk. The question I posed to the Hometalk community was this: How do you remove paint from window glass? You may remember this photo of our kitchen. Notice how the shutters are closed? 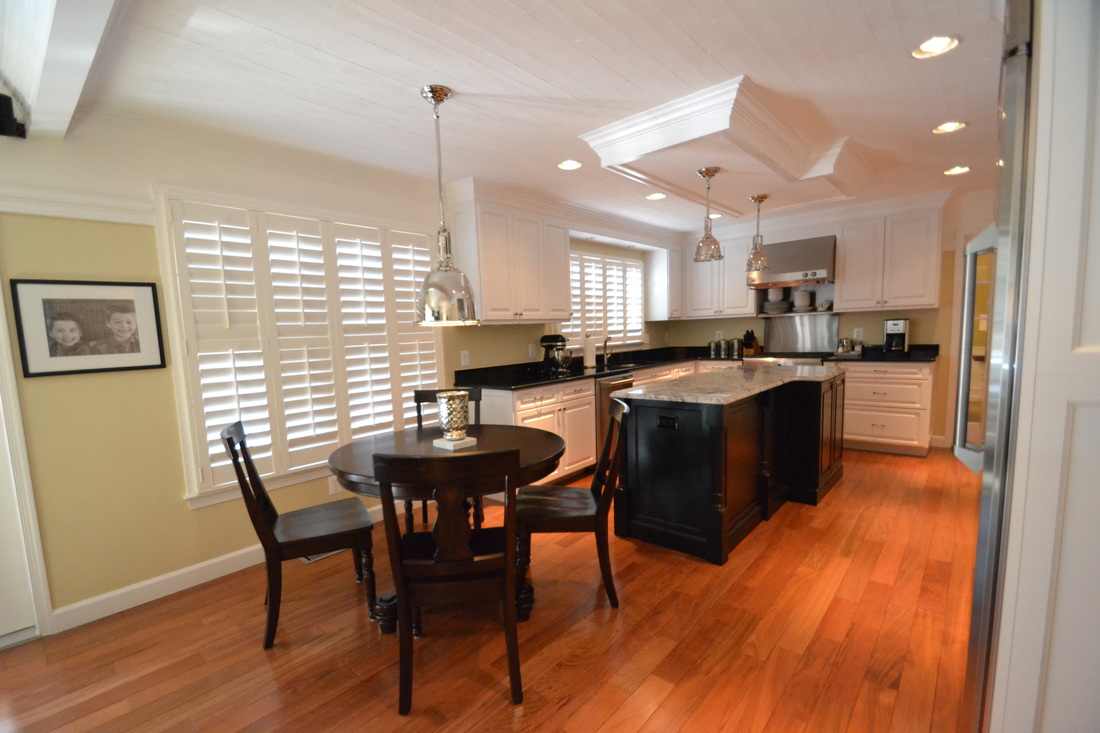 It's because the windows have looked like this for months! 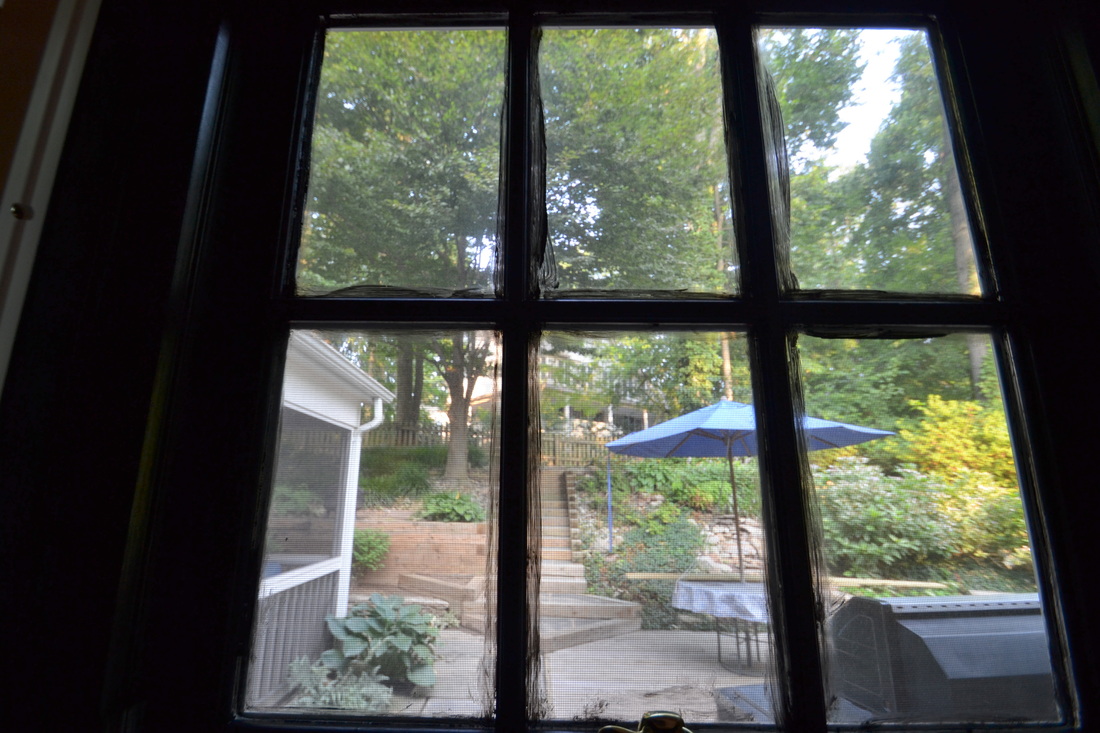 So here's what I was told: 1) Make sure the windows are wet before you scrape off the paint, otherwise you'll scratch the glass {didn't know that}. 2) Use a razor blade or paint scraper to remove the paint. 3) Use chemicals to get it off, including: Goof Off, Magic Eraser, denatured alcohol, Jaysco, or acetone. As it turned out, all I needed to do was spray the glass panes with water, and use this tool {$7 at Home Depot}. I could see why you might need a stronger chemical if you had multiple layers of paint and primer, but this came off easily since it was just one layer of paint. The tool was super sharp {what did I expect from a razor blade, you ask?} which, combined with my tendency to rush and be careless, resulted in a deep cut in my finger. I started to bleed profusely, which almost ruined my little project! But I wrapped my finger in a paper towel and scotch tape until my ER-doctor neighbor came over to make a house call. Then the power went out for a few hours. But in the end, success was mine, thanks to all the great advice I received from the folks at Hometalk: 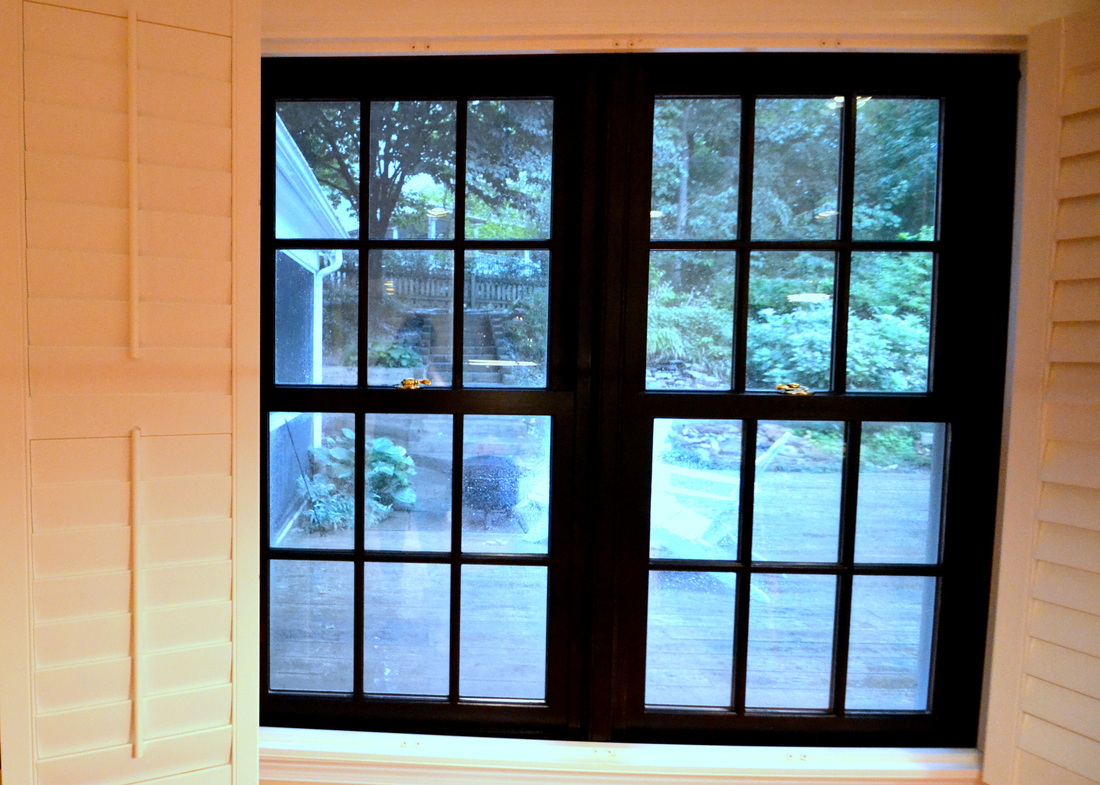 If you hop over to Hometalk, be sure to look me up! I'm Aimee B. from Reston, Virginia...the obsessed fan and incessant question-asker. ;-)
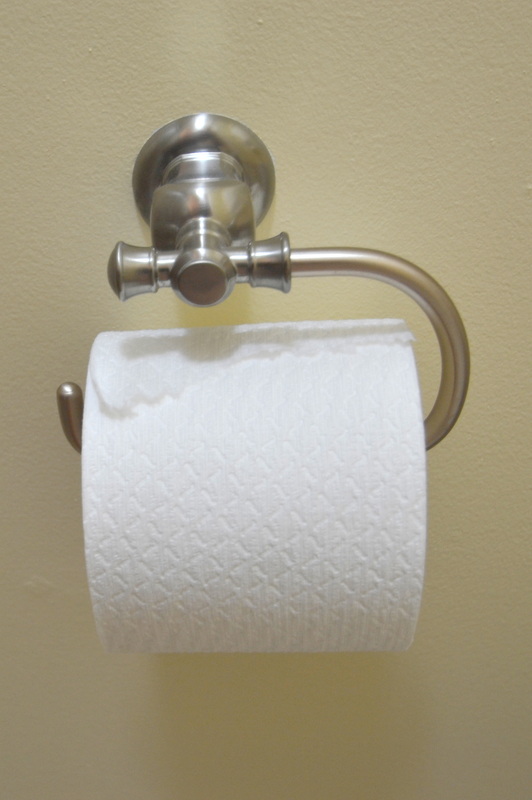
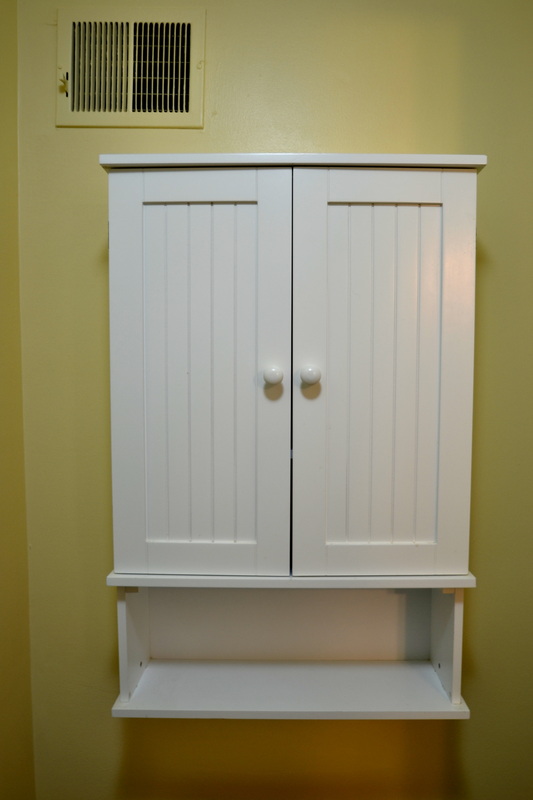
Have a great Monday! So up until yesterday, I wasn't really feeling the whole Rugs USA experience. At first, I was SUPER excited because I ordered this 9x12 outdoor rug for 75% off! SCORE! Then, I was super annoyed because I got an email that said my account had been charged $567. Say what now? I emailed them right away {on Saturday}, but I guess their customer service office is only open Monday-Friday during business hours...but two days later, they sent me an email saying my account had been credited $426, which was good. Does that response time seem a little long, in this day and age? They must be a small business. A few days later, I got an email telling me I'd get it Friday! Yay! But when I checked the UPS tracking, it said UPS was looking for a house number...which was right in the order? I contacted Rugs USA customer service, and they said they would look into it and send me an email. No rug on Friday. No email from customer service. Yesterday, I contacted customer service again because the UPS tracking said they had attempted delivery but no one was home. Customer service guy informs me that they ALWAYS leave the packages on the front steps. I send him the UPS tracking note and then he says, ohhhhhh, it must be because it's a large size so I'd have to plan to be home. Is there anything else he can do to help me? YES! Get my $#@%&*$ rug! But...all is well that ends well. I have my lovely outdoor rug, which I got for a steal, and my porch is coming together just in time for the 4th. Have a great holiday, everyone! {Linking to Addicted 2 Decorating} 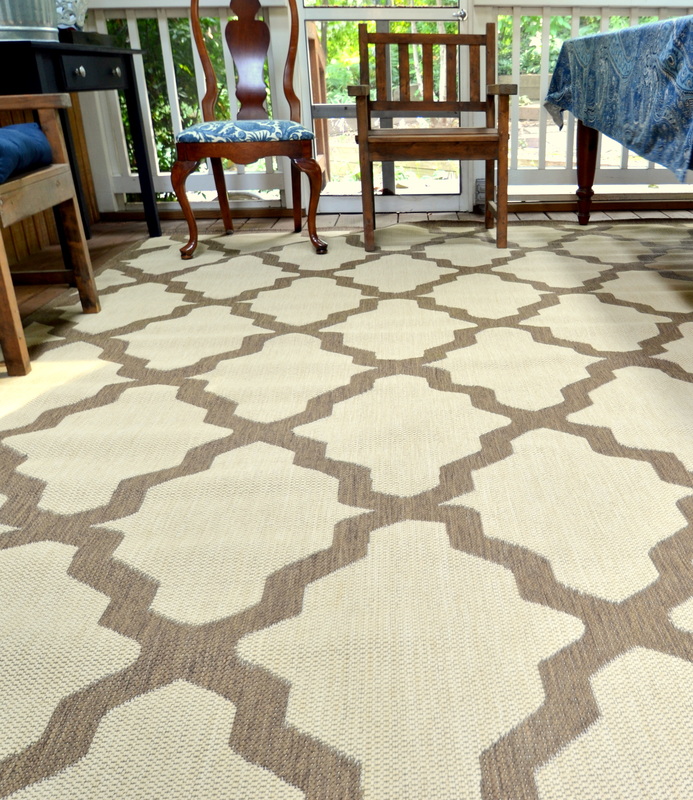 My brother Josh {an avid NON-reader of this blog...thanks bro!} and sister-in-law Molly live about 2 miles away from us in Reston. In an odd coincidence, their house number is "Sixteen Forty-One," which is pretty close to good old Sixteen Fourteen. :-) They've been in their house for about 3 years, so they’re starting to get around to some pretty major projects...including the bathrooms. They completed the master bath a couple of weeks ago, and plan to tackle the guest bath next. The Lowdown Floors: Dated linoleum Walls: "Builder white" Shower: Old, peeling white plastic Vanity: White vanity with extraneous "columns" Like the good blog-relative she is, Molly had the presence of mind to take "before" shots! Here are the old linoleum floors: 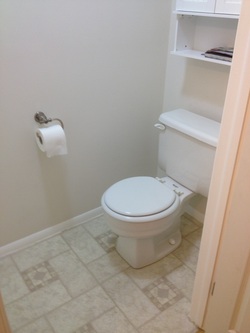 Here's the shower before. Clearly, there was a peeling problem! 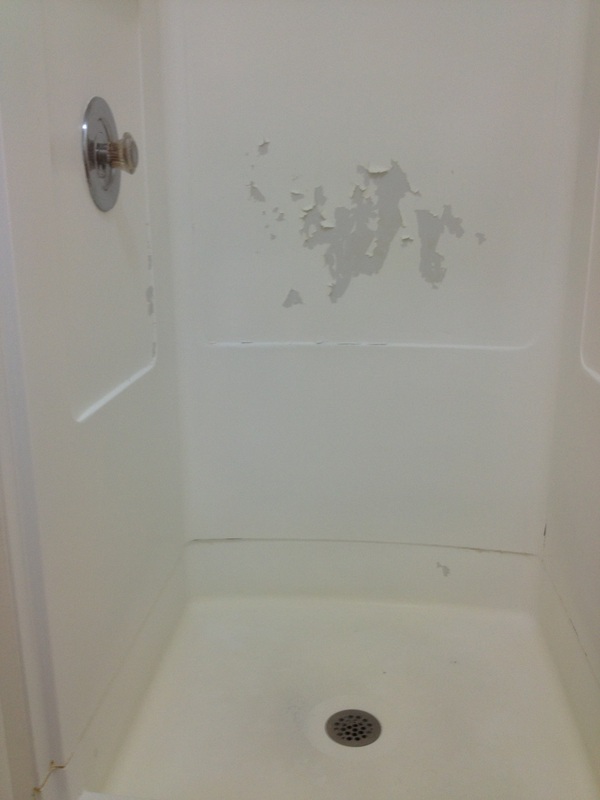 Here's the vanity, which is just outside the room with the shower and toilet. Apparently someone got creative with the...columns? Also, the off white wall-to-wall carpet wasn't ideal for a bathroom area. 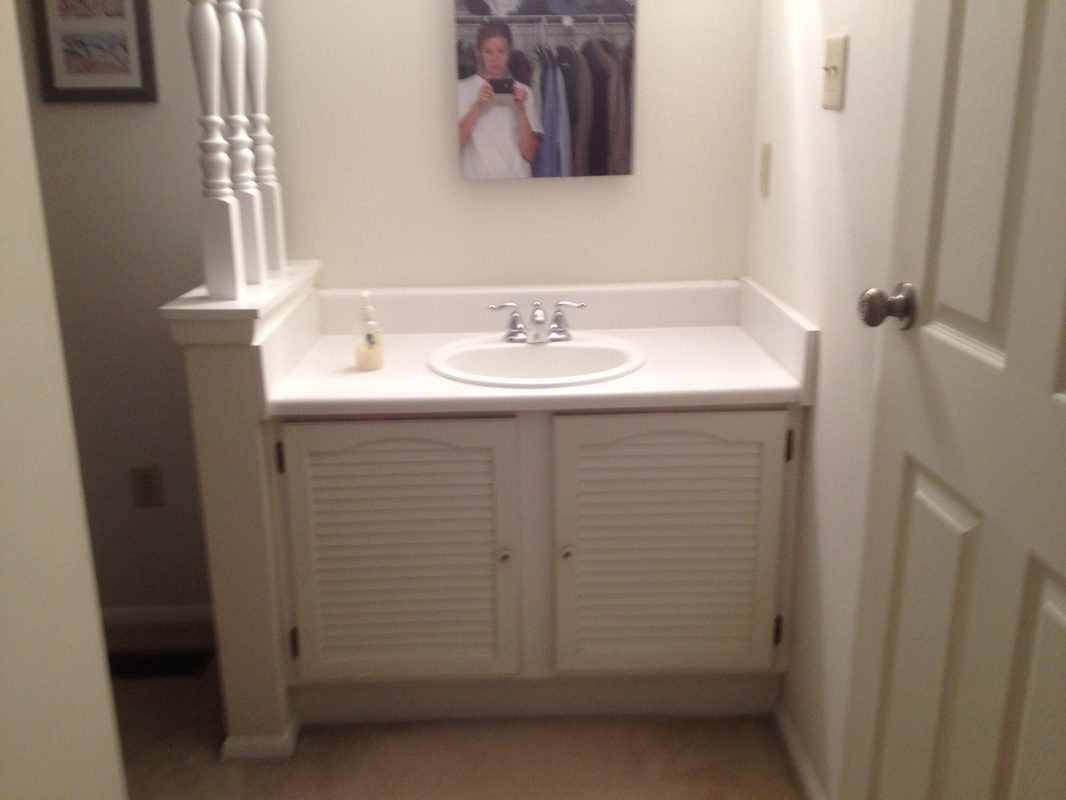 And now...the fabulous "afters!" This was a true gut renovation {my favorite kind, of course!} Here's the shower, with the beautifully done tile work: 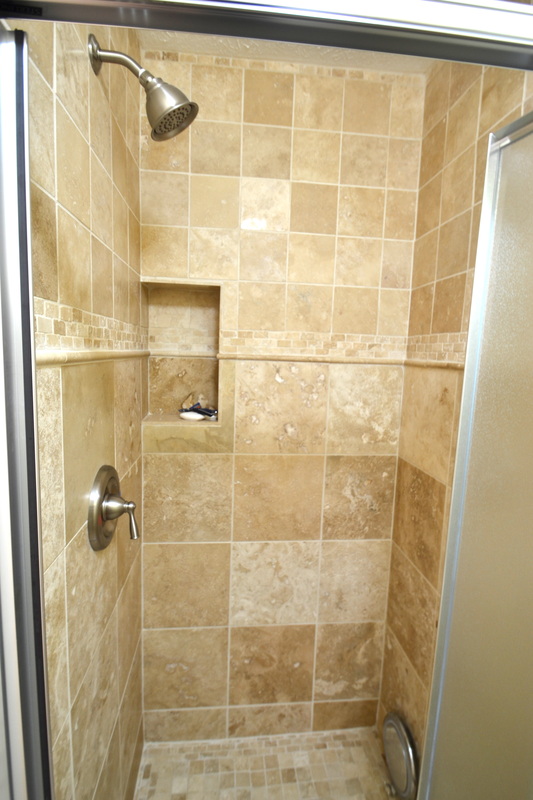 Here's the shower floor. Isn't it gorgeous? 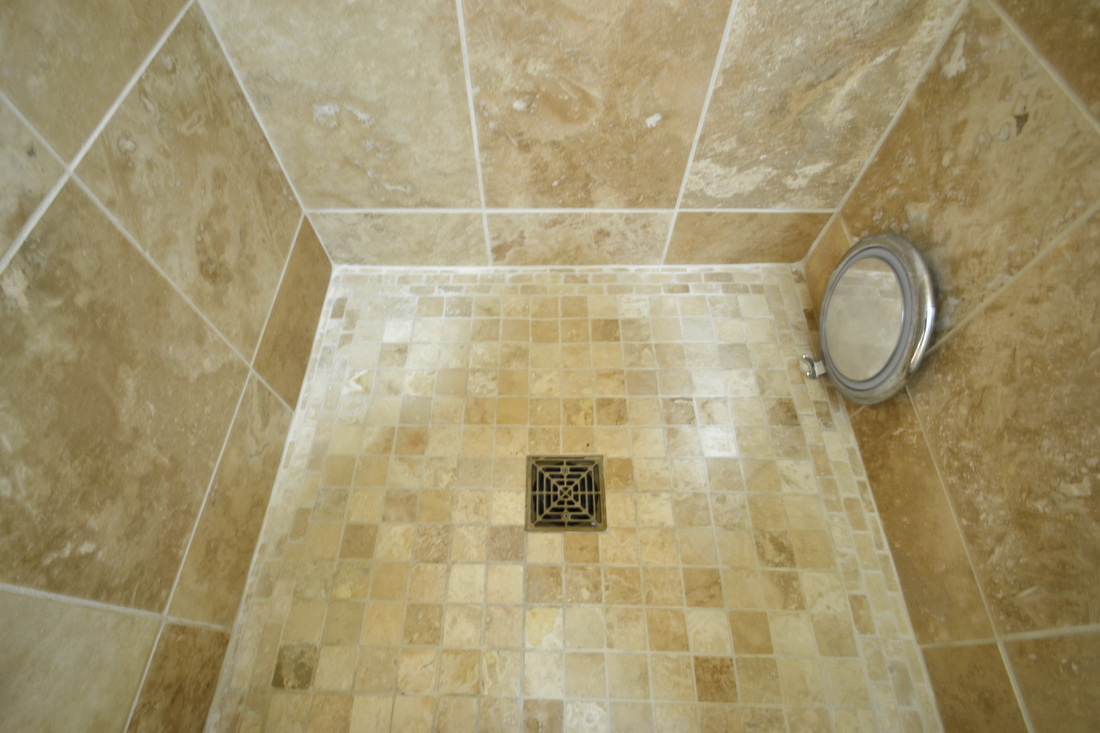 Everyone loves a brand-new, shiny toilet, am I right? 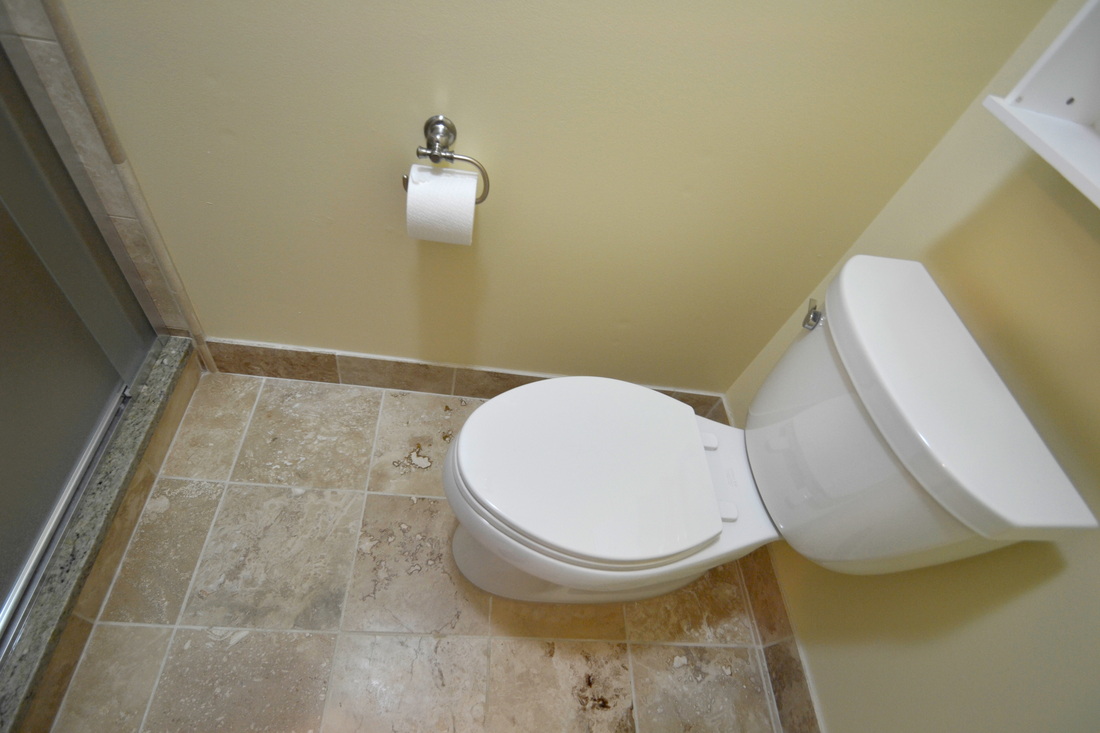
I love the floors: 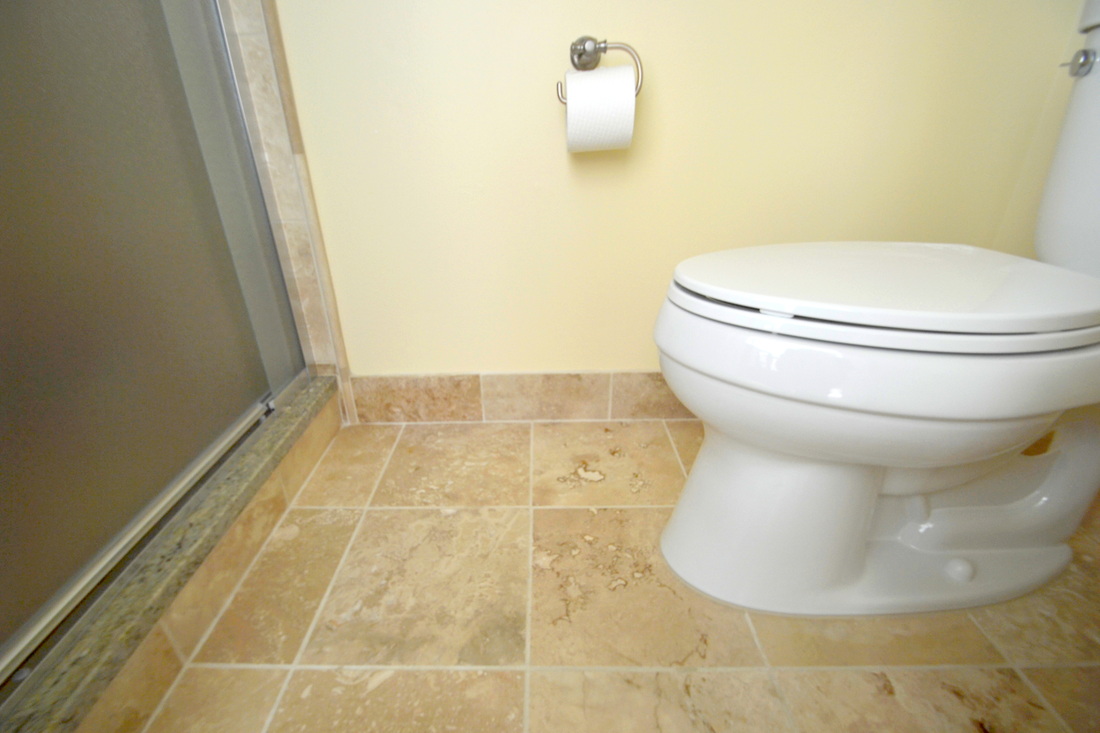 And the brand-new vanity, minus the half-wall and spindly column things, with tile instead of white wall-to-wall: 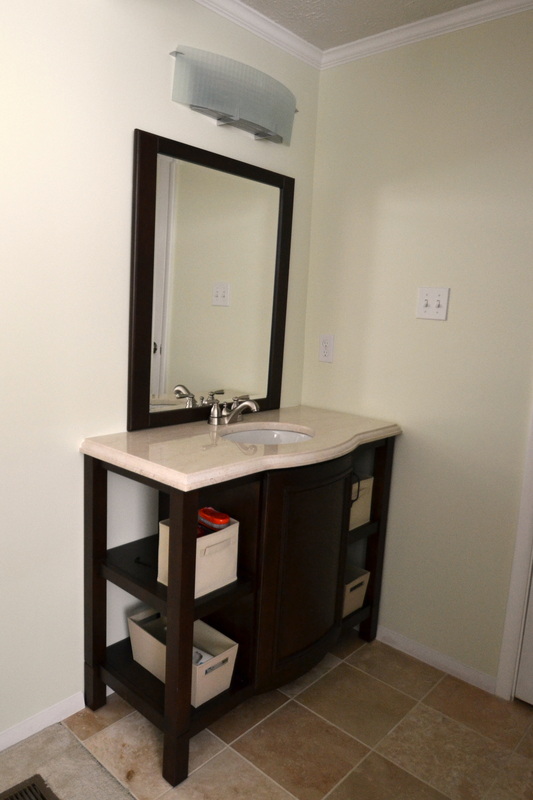 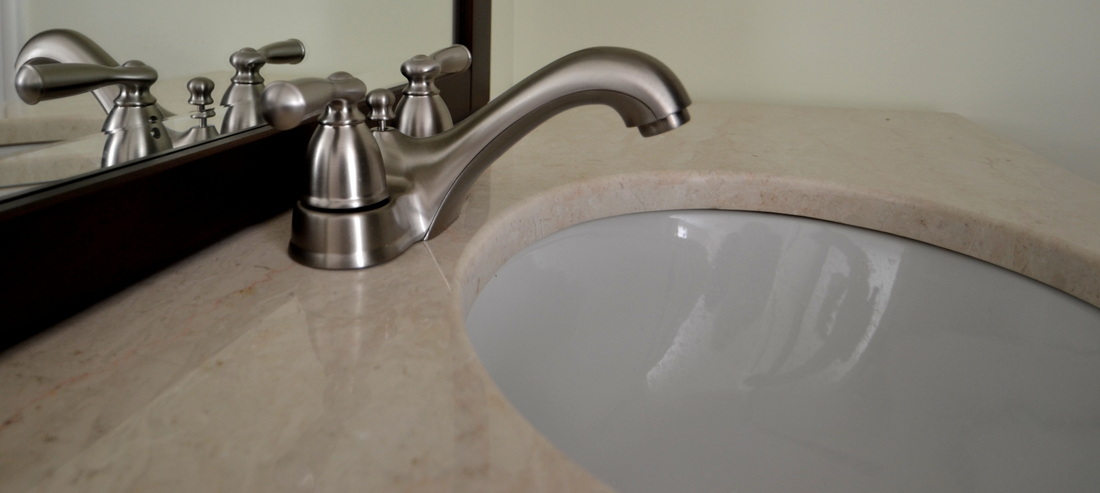 The project summary is quick: They used an awesome contractor who took care of everything: Don Knowles @ Knowles Contracting Josh and Molly, thank you so much for sharing your gorgeous master bathroom renovation! I can't wait to see how the NEXT bathroom comes out {you know I'll be there, camera in hand!} Love you both! xoxo Joining: Between Naps on the Porch  |